How to Change Your Slack Status with Serene (Tutorial)
Last week, we discussed how to reduce interruptions from colleagues in the office using Serene and a lighting system, but what if your team is remote or spread across multiple offices?
Enter Slack statuses.
This underutilised feature in Slack makes disruptive colleagues think twice before messaging you while you’re in the middle of an important piece of work by letting them know you’re in Serene mode.
Note: We advocate using Serene’s app blocker to completely block distracting apps like Slack when you’re in Serene mode rather than relying on your Slack status. This feature is intended to let colleagues know why you’re not around & to reach out in 30 minutes or so.
For this tutorial you’ll need:
- Slack
- Serene
- A Zapier account (free)
- Approx. 10-15 minutes
How to Change Your Slack Status When You Go Serene
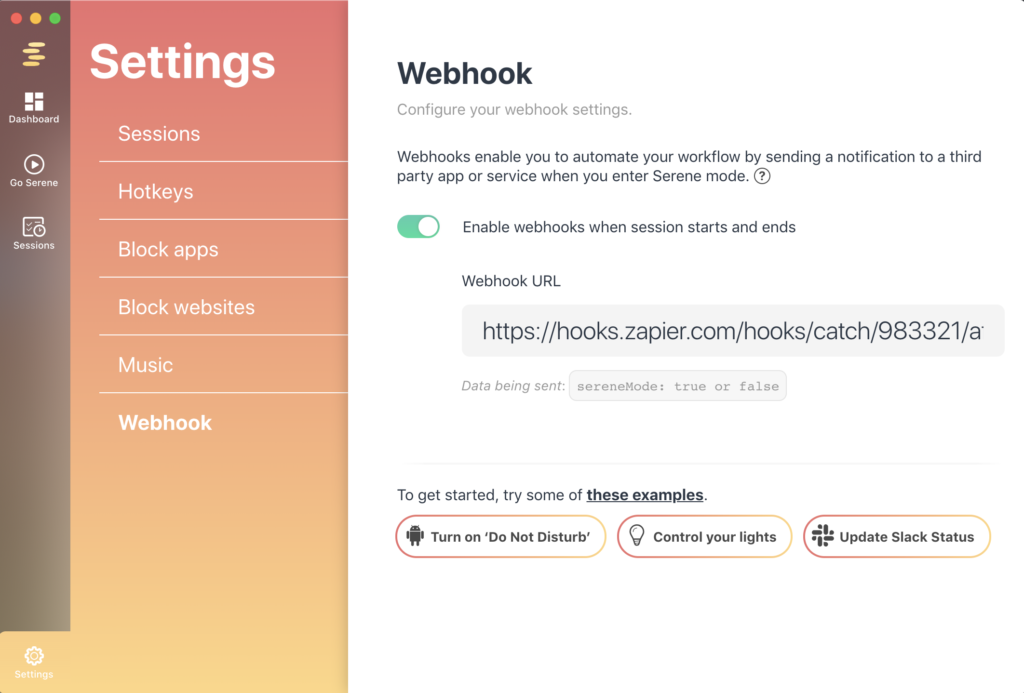
Step 1: Create a zap where the trigger is ‘catch hook’
- Open Zapier.com
- Click ‘Make a Zap’ in the top navigation
- Search for ‘Webhooks by Zapier’ and select this as the trigger
- Select ‘Catch hook’ and click ‘Save + Continue’
- Copy the webhook URL and paste it in the webhook URL field in Serene under settings > webhook
- Optional: To test that this step works before moving on, you can either click Go Serene in Serene to ping your webhook URL, or click ‘Skip this step’
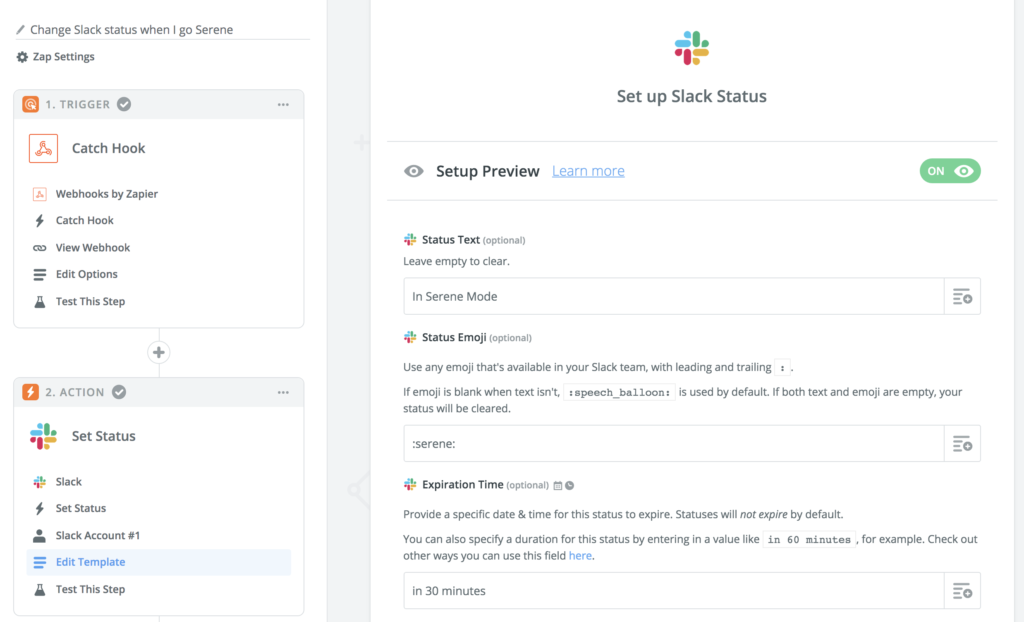
Step 2: Set your zap’s action to change your Slack status
- In Zapier, click ‘OK, I did this’ and continue to add an action step
- Search for Slack and select this as the action
- Click ‘Show less common options’ and select ‘Set Status’
- Continue without samples to set up your action
- Connect your Slack account
- Change the Status Text to ‘In Serene Mode’
- Set the status emoji to :serene: (we’ll explain this in step 3!)
- Set the expiration time to 30 minutes.
- Send a test to Slack, click finish and turn your zap on!
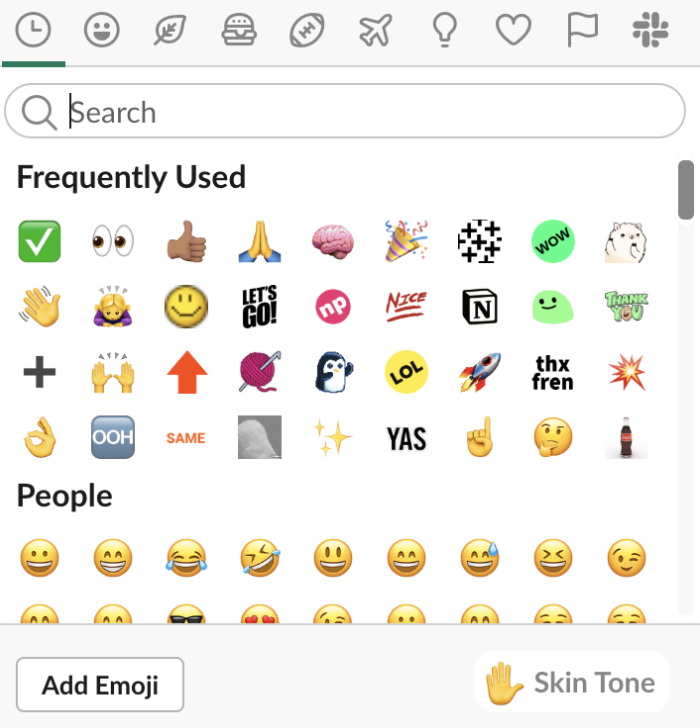
Step 3: Add the Serene emoji to Slack
- Download this image by right-clicking and select ‘save image as’
- In Slack, click the emoji icon you would click to send an emoji
- Click ‘Add Emoji’ in the bottom left corner
- Upload the image of the Serene icon you download
- In the field ‘Give it a name’ enter :serene:
- Save, and your done!
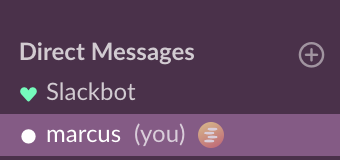
Now, anytime you Go Serene your Slack status should automatically be changed to ‘In Serene Mode’ with the Serene icon indicating to colleagues that you’re not to be interrupted!